Table of Contents
- 📋 Creating Lists in SharePoint
- ✏️ Editing Lists in SharePoint
- 🧩 Working with SharePoint List Features
- ⚙️ Working with Advanced Column Types in SharePoint Lists
- 🧮 Working with Calculated Columns in SharePoint
- 🔗 Creating and Using Lookup Columns in SharePoint Lists
- 💬 Adding Comments and Tracking Version History in SharePoint Lists
- 🧩 Working with Columns and Conditional Fields in SharePoint Lists
- ✅ Ensuring Proper Form Validation in SharePoint Lists
- 📅 Calendar View in a SharePoint List
- 🔔 Working with Alerts in Microsoft SharePoint
- 📤 Working with SharePoint Lists: Exporting and Deleting Data
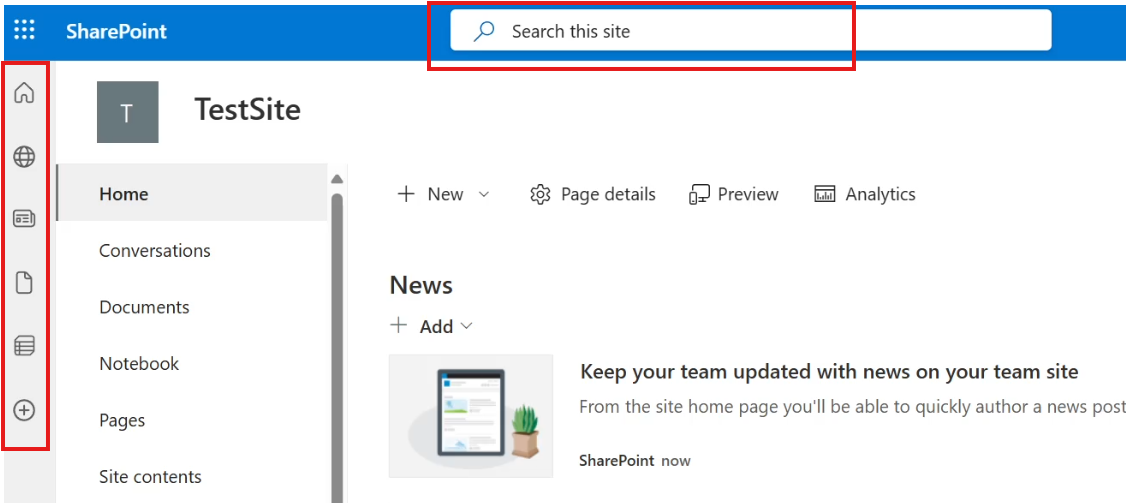
📋 Creating Lists in SharePoint
SharePoint Lists are like smart, collaborative tables where teams can store, track, and manage information. Think of them as an upgraded version of Excel—built directly into SharePoint with powerful features like filtering, automation, and integration with Microsoft 365 tools.
In this section, you’ll learn the different ways to create a list:
- From Excel data
- From scratch
- By copying an existing list
- Using ready-made templates
Video Explanation
🚀 Why Use SharePoint Lists?
Before jumping into the steps, here’s why lists are so useful:
- 🗂 Centralized Data – everyone works from the same source
- 🎛 Custom Columns – text, choice, number, date, people, and more
- 🤖 Automation Ready – works with Power Automate & Power Apps
- 📈 Scalable – perfect for small trackers or large systems
🧱 Method 1 – Create a List from Excel
If you already have data in Excel, you don’t need to retype anything.
Step-by-Step
- Prepare Excel Data
- Ensure your data has proper column headers
- Select the range
- Use Format as Table in Excel
- Import to SharePoint
- Click New → List → From Excel
- Upload the file
- Preview the table
- Configure Columns
- Set the correct data type for each column
- Choose which column should act as Title / Primary Key
- Use Choice type for fields like Department or Location
- Create the List
- Give it a name (e.g., Customers)
- Click Create
✅ Your Excel data is now a fully functional SharePoint list!
🧱 Method 2 – Create a List from Scratch
Perfect when starting fresh.
Steps
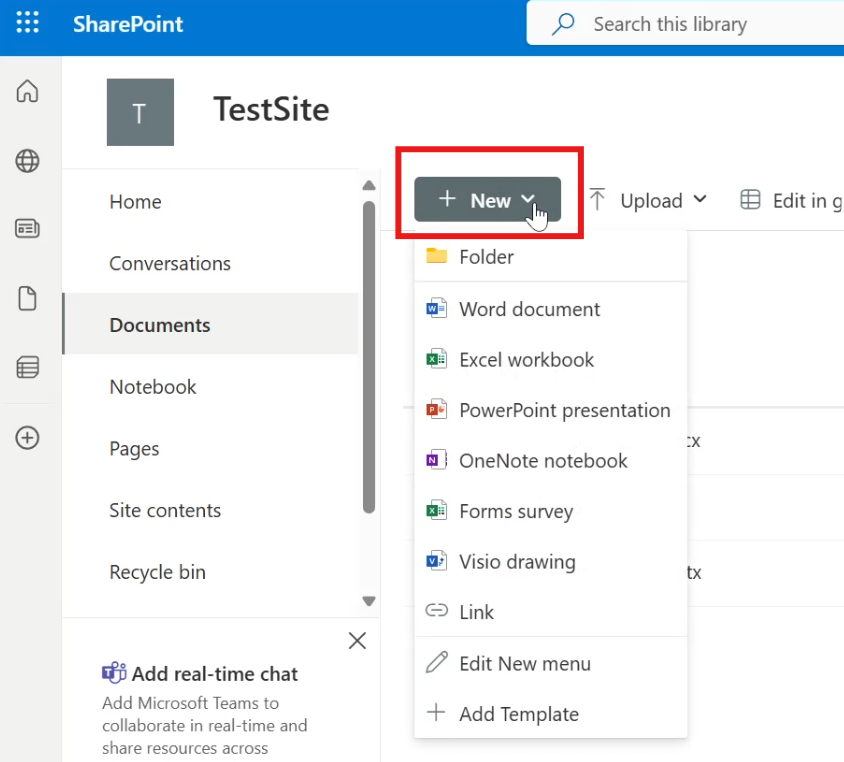
- Go to New → List → Blank List
- Give your list a name
- By default, you’ll get a Title column
- Add custom columns:
- ➕ Add Column → Single line of text → Name
- ➕ Add Column → Choice → Department
- Options: Accounting, Sales, HR, etc.
- Add items using New Item
💡 Tip: You can rename the Title column to something meaningful like Employee ID.
🧱 Method 3 – Create from an Existing List
Reuse structure without rebuilding everything.
- Click New → List → From Existing List
- Choose a list to copy
- Give the new list a name
- Click Create
👉 The new list will contain the same columns and settings.
🧱 Method 4 – Use SharePoint Templates
SharePoint includes ready-made list templates like:
- 🐞 Issue Tracker
- 👥 Employee Onboarding
- 📦 Asset Manager
- 📝 Event Itinerary
Just:
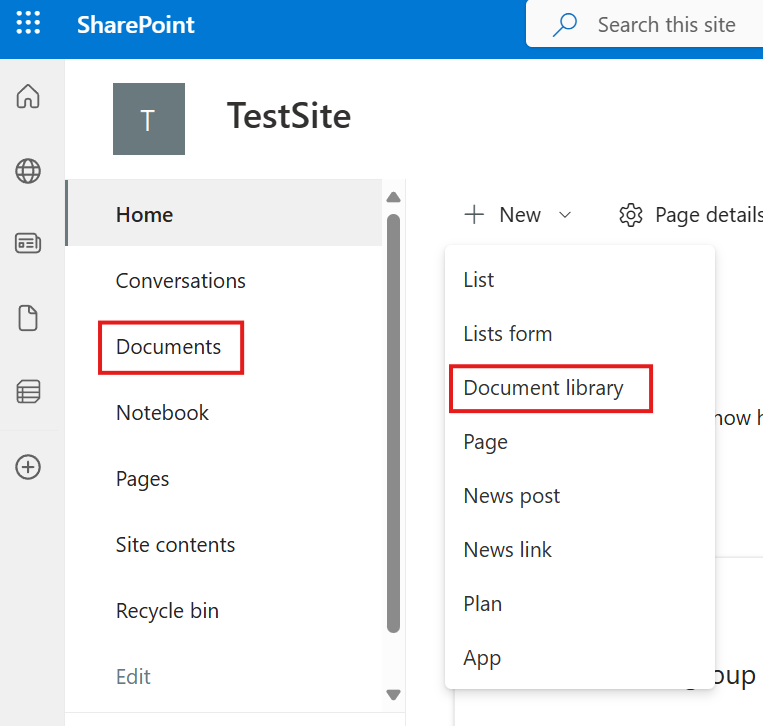
- Select New → List
- Scroll to Templates
- Pick one
- Name it → Create
Instant professional structure! 🎉
🎯 What You’ve Learned
You can now create SharePoint lists:
- From Excel imports
- From scratch with custom columns
- By copying existing lists
- Using built-in templates
These lists can become the backbone of tracking customers, employees, assets, projects, and more.
✏️ Editing Lists in SharePoint
SharePoint lists aren’t just for storing data—they’re meant to be edited, updated, and customized as your team works. SharePoint gives you multiple ways to modify list items: quick single-item edits, bulk updates using grid view, and even advanced customization through content types and form layouts.
Let’s walk through the most practical ways to edit and manage your SharePoint lists.
Video Explanation
📝 Edit a Single List Item
This is the most common method when you need to update one record or attach supporting files.
How to edit an item:
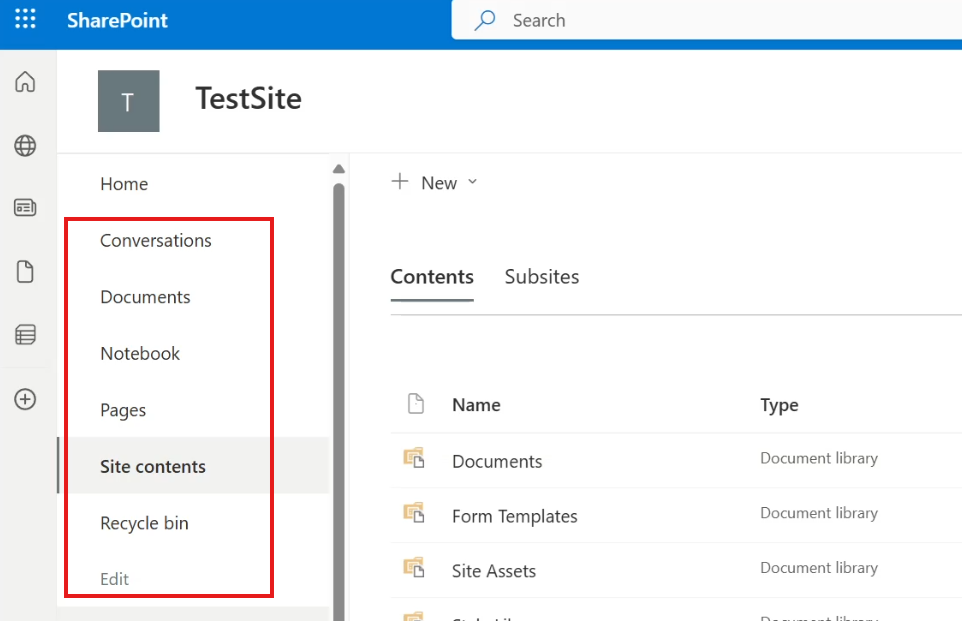
- Go to your list from Site Contents
- Click the item you want to update
- Select Edit from the top menu (or from the three dots ⋯ menu)
- Update the fields in the form
- (Optional) Upload files in the Attachments section
- Click Save
💡 Best for: Quick corrections, adding documents, or updating one record at a time.
🔓 Enable “Allow Management of Content Types”
Sometimes you may find that certain items can’t be edited. This usually happens because content type management is turned off.
Enable it like this:
- Open List Settings (gear icon → List Settings)
- Go to Advanced Settings
- Set Allow management of content types = Yes
- Click OK
After this:
- A new Content Types section appears
- You can view and edit the default “Item” content type
- Add extra columns from site or list columns
💡 Why this matters:
It unlocks deeper control over list structure and ensures full editing flexibility.
📊 Edit in Grid View (Excel-Style Editing)
Need to update many rows fast? Grid view turns your list into a spreadsheet.
Steps:
- Open the list
- Click Edit in grid view
- Update cells directly like Excel
- Click Exit grid view to save
⚡ Best for: Bulk updates, data cleanup, and fast entry.
🧩 Powerful Features in the Edit Form
The SharePoint edit form includes more than just fields:
- 💬 Comments – discuss changes right on the item
- 🕒 Activity Log – view history of edits
- ✏️ Edit Columns – choose which fields appear
- 🎨 Configure Layout – customize header/body/footer (even with JSON)
- 🔗 Copy Link – share a direct link to the item
These tools help you turn a simple list into a collaborative workspace.
🎯 Key Takeaways
- Use basic edit mode for quick updates & attachments
- Enable content type management for advanced control
- Use grid view for bulk, Excel-like editing
- Customize the edit form for better user experience
With these options, SharePoint lists become flexible tools that adapt to how your team works—not the other way around. 🚀
🧩 Working with SharePoint List Features
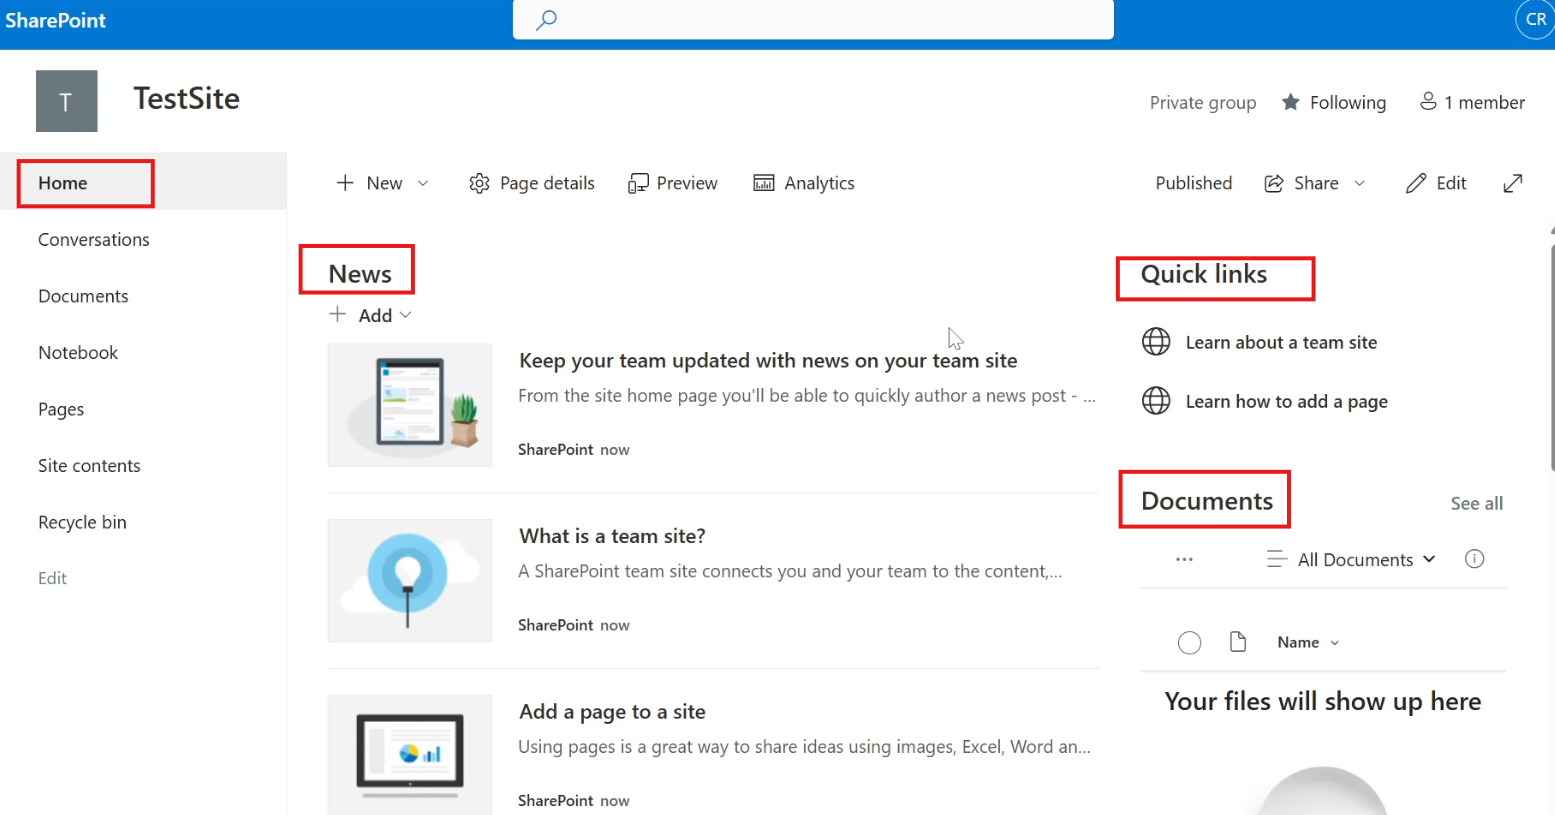
SharePoint lists are more than simple tables—they’re interactive tools designed to help you explore, organize, and collaborate on data. In this section, we’ll look at some of the most useful built-in list features: sharing individual items, sorting and grouping, using the filter pane, and calculating column totals.
These features make large datasets easier to understand and help teams work smarter together. 🚀
Video Explanation
🔗 1. Item Page in a SharePoint List
Every list item has its own dedicated page where you can view details, track activity, and collaborate through comments.
What you can do:
- 📎 Copy Link – share a direct URL to a single item
- 💬 Comments & Activity – discuss updates in context
- 👥 User Presence – see when others are viewing the same item
How to share an item link:
- Open your list and select an item
- Click the three dots ⋯ next to it
- Choose Copy Link
- Share the URL with teammates
💡 Perfect for: Sending someone directly to one record instead of the whole list.
📊 2. Sort and Group Your Data
Large lists can feel overwhelming—sorting and grouping help bring order.
Benefits
- Sorting organizes alphabetically or numerically
- Grouping clusters similar items into collapsible sections
Try this:
- Click any column header
- Choose Sort A→Z or Sort Z→A
- Select Group by to create categories
- Use the arrows to expand or collapse groups
👉 To return to normal view, open the column menu again and uncheck Group by.
🎯 3. Use the Filter Pane
The filter pane lets you narrow results across multiple columns at once—great for big datasets.
Steps
- Click the filter icon (top right)
- Select values from one or more columns
- Click Apply
- Use Clear All to reset
Example:
Filter Office = Toronto AND Brand = Mercedes to see only matching records.
💡 Ideal for: Finding exactly what you need in seconds.
➕ 4. Column Totals
Need quick calculations? SharePoint can show them directly in the list view.
Available options
- 🔢 Count – works on any column
- ➗ Sum & Average – available for numeric fields
How to enable totals:
- Click a column header
- Select Totals → Count / Sum / Average
- View results at the bottom of the list
- Combine with Group by to see subtotals per category
✅ Key Takeaways
- Copy Link to share individual records instantly
- Sort & Group to make long lists readable
- Filter Pane to zero in on the right data
- Totals for quick insights without Excel
With these features, SharePoint lists become a powerful dashboard for everyday teamwork—no technical skills required! 💪
⚙️ Working with Advanced Column Types in SharePoint Lists
SharePoint lists become truly powerful when you move beyond simple text columns. By using advanced column types, you can tag items, assign ownership, and manage dates with precision—making your data easier to organize, search, and analyze.
Let’s explore three essential column types:
- 🏷 Multi-select Choice columns for tagging
- 👤 Person or Group columns for assigning responsibility
- 📅 Date columns for accurate time-based data
Video Explanation
🏷 1. Multi-Select Choice Column – Smart Tagging
Tags help categorize records so you can filter and group them later. A Choice column with multi-select lets users assign multiple labels to the same item.
How to create it:
- Open your list → Add Column → Choice
- Name the column (e.g., Tags)
- Enter options such as:
- Loyal
- Price Driven
- Buy Zone
- Enable Allow multiple selections
- (Optional) Turn on Allow values to be added manually
- Click Save
What users see:
When editing an item, they can pick multiple tags from a dropdown—perfect for flexible categorization.
💡 Great for: Customer segmentation, project labels, priority flags.
👤 2. Person or Group Column – Assign Ownership
Need to assign a record to someone in your organization? The Person/Group column connects directly to your company directory.
Steps to add:
- Click Add Column → Person or Group
- Name it (e.g., Associate)
- Enable Show profile photos (optional)
- Click Save
How it works:
- Users can search by name or email
- The field pulls real profiles from Microsoft 365
- Ideal for task ownership and accountability
💡 Perfect for: Assigning cases, owners, reviewers, or contacts.
📅 3. Date Column – Convert Text to Real Dates
If dates are stored as plain text, you lose sorting, filtering, and validation. Converting to a Date and Time column unlocks powerful features.
Convert an existing column:
- Click the column header
- Select Column Settings → Edit
- Change type to Date and Time
- Optional:
- Enable Include Time
- Turn on Friendly Format
- Click Save
Result:
Your dates can now be sorted chronologically, filtered by range, and used in automation.
💡 Essential for: Birthdays, deadlines, renewals, and schedules.
✅ Why These Columns Make a Difference
| Column Type | Business Benefit |
|---|---|
| Multi-Select Choice | Flexible tagging & filtering |
| Person/Group | Clear ownership & collaboration |
| Date | Accurate time-based operations |
🎯 Final Thoughts
Using the right column types transforms a basic SharePoint list into a smart information hub. You’ll get:
- Better organization
- Faster filtering
- Clear accountability
- Reliable date handling
Start upgrading your lists today and watch your data come to life! 🚀
🧮 Working with Calculated Columns in SharePoint
Ever wished SharePoint could do the math for you? That’s exactly what calculated columns are for! Instead of manually entering values like age, totals, or status messages, SharePoint can generate them automatically using formulas.
For example, if your list has a Date of Birth column, you can create an Age column that updates itself—no manual updates needed. Let’s dive in!
Video Explanation
✅ What Are Calculated Columns?
A calculated column generates its value using data from other columns in the same list. It’s perfect for:
- 🎂 Calculating age from Date of Birth
- 🧾 Combining First Name + Last Name into Full Name
- 📊 Performing math on numeric fields
- 🚦 Displaying status messages like Completed / Pending
🛠 How to Create a Calculated Column
Step 1 – Add a New Column
- Open your SharePoint list
- Click Add Column
- Choose See all column types → click Next
Step 2 – Select Calculated Type
- Name your column (e.g., Age)
- Choose Calculated (calculation based on other columns)
Step 3 – Enter the Formula
To calculate age from Date of Birth:
=DATEDIF([Date of Birth], TODAY(), "Y")
DATEDIFfinds the difference between two dates"Y"returns the result in years
Step 4 – Set Return Type
- Choose Number
- Set Decimal Places = 0 (age should be a whole number)
Step 5 – Save 🎉
Click OK—your Age column will now calculate automatically!
💡 Tips for Writing Formulas
- Always use column names in square brackets →
[Column Name] - Calculated columns work only with data inside the same list
- You can use logic like IF statements, math, and text functions
📌 Useful Calculated Column Examples
1. Create Full Name
=[First Name] & " " & [Last Name]
➡ Combines two text fields with a space.
2. Status Based on Percentage
=IF([Completion] >= 100, "Completed", "In Progress")
3. Add Price + Tax
=[Price] + [Tax]
4. Overdue Check
=IF([Due Date] < TODAY(), "Overdue", "On Track")
5. Days Remaining
=[Due Date] - TODAY()
6. Value Category
=IF([Amount] >= 1000, "High Value", "Standard")
7. Discounted Price
=[Price] - ([Price] * [Discount]/100)
8. Show Month Name
=TEXT([Order Date], "mmmm")
9. Time-Based Greeting
=IF(HOUR(NOW())<12,"Good Morning","Good Afternoon")
🚀 Why Calculated Columns Are Awesome
- ⏱ Save time—no manual updates
- 🎯 Reduce human error
- 📈 Create smarter, dynamic lists
- 🔍 Enable better filtering & reporting
🎯 Final Thoughts
Calculated columns turn a simple SharePoint list into a mini application. Whether you’re calculating age, totals, statuses, or messages—SharePoint does the heavy lifting while you focus on insights.
Start experimenting with formulas and make your lists work smarter, not harder! 💪
🔗 Creating and Using Lookup Columns in SharePoint Lists
Lookup columns are one of the most powerful features in SharePoint lists. They allow you to connect two lists together, so data can be reused instead of duplicated.
For example, instead of typing the same repair shop details for every customer, you can maintain a separate Repair Shops list and simply link customers to it. Any updates to the shop details will automatically reflect in the Customers list. Smart, right? 😎
Video Explanation
✅ Why Use Lookup Columns?
- 🔁 Reduce Data Duplication – Enter data once, reuse everywhere
- 🎯 Maintain Consistency – Updates in one list reflect in others
- 🧭 Better Navigation – Jump easily between related records
- 📊 Cleaner Reports – Structured relationships between lists
1️⃣ Create a Source List (Repair Shops)
Before creating a lookup column, we need a list that will act as the data source.
🛠 Steps
- Go to your SharePoint site → New → List
- Choose Blank List and name it Repair Shops
- Add these columns:
- Shop Name – Single line of text
- Email – Single line of text
- City – Single line of text
- Rename the Title column → Shop ID (acts as unique identifier)
✏ Add Sample Data
| Shop ID | Shop Name | City | |
|---|---|---|---|
| 101 | QuickFix Repairs | info@quickfix.com | Toronto |
🎉 This list will now be used as the lookup source.
2️⃣ Create Lookup Column in Customers List
Now we’ll connect the Customers list to Repair Shops.
🛠 Steps
- Open the Customers list
- Click Add Column → See all column types → Next
- Configure:
- Name: Repair Shop
- Type: Lookup
- Get information from: Repair Shops
- Display column: Shop Name
- Under Add additional columns, select:
✔ Shop Name
✔ Email - Click OK
🎯 Result
Your Customers list will now show:
- Repair Shop (dropdown)
- Shop Name (auto-filled)
- Email (auto-filled)
3️⃣ Test the Lookup Relationship
🧪 Steps
- Edit a customer record
- In Repair Shop, choose a shop from dropdown
- Click Save
✅ The related Shop Name & Email appear automatically!
🔄 What Happens When Source Data Changes?
👉 If you update the email in Repair Shops,
👉 The change instantly reflects in Customers list!
Also:
- Clicking the shop name in Customers opens the Repair Shop item page
- Users can view or edit details (based on permissions)
🚀 Key Benefits Recap
- 🧩 Builds real relationships between lists
- 🔁 Single source of truth
- ⚡ Real-time updates across lists
- 🗂 Cleaner, more professional data structure
💡 Pro Tip
Use lookup columns for:
- Assigning vendors to orders
- Linking employees to departments
- Connecting projects to clients
- Any scenario where the same data repeats!
Lookup columns transform SharePoint from simple lists into a mini relational database—without any coding. Start connecting your lists and make your data smarter today! 🚀
💬 Adding Comments and Tracking Version History in SharePoint Lists
SharePoint lists aren’t just for storing data—they’re built for team collaboration and accountability. Two standout features make this possible:
- 🗨 Comments – discuss items directly inside the list
- 🕓 Version History – track every change and restore older versions
Let’s see how these tools help keep communication clear and your data safe.
Video Explanation
🗨 Comments in SharePoint Lists — Collaborate in Context
Comments let your team talk about a list item right where the data lives. No more hunting through emails or chats to find updates!
🌟 Why Comments Are So Useful
- Keep discussions tied to the exact item
- Tag teammates with @mentions
- Build a timeline of decisions and notes
- Perfect for customer lists, tasks, approvals, and projects
🧭 How to Add a Comment
- Open your SharePoint list
- Click the item you want to discuss
- Select Edit to open the item form
- On the right side, find the Comments section
- Type your message
- Use @Name to mention a colleague
- Click Send
💡 Tip: When you @mention someone, they get a notification—great for quick follow-ups!
🕓 Version History — Never Lose Track of Changes
Version History records every update made to a list item:
- Who changed it
- When it was changed
- What the previous values were
If something goes wrong, you can easily roll back to an earlier version.
🎯 Why Use Version History?
- 🛡 Protect against accidental edits
- 📋 Meet auditing/compliance needs
- 👀 See exactly who modified what
- ⏪ Restore previous information in seconds
🧭 How to View Version History
- Go to your list
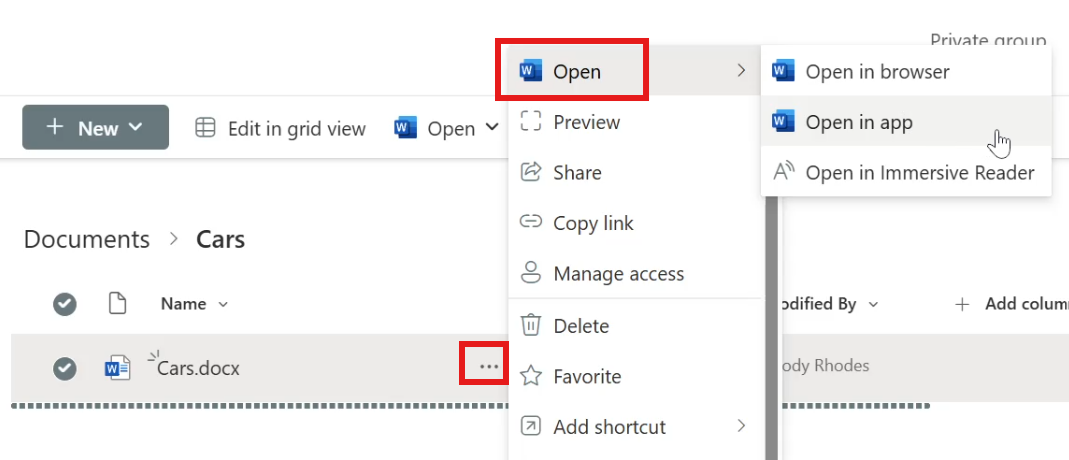
- Click the three dots (…) next to an item
- Select Version History
You’ll see:
- Version number
- Modified date/time
- Modified by
🔁 What You Can Do from Here
For any version, you can:
- View – open details of that version
- Restore – bring it back as the current version
- Delete – remove that version from history
✅ Restoring doesn’t erase newer versions—it simply creates a new “latest” version based on the old one.
⚙ Pro Tip: Enable Versioning
Make sure version history is turned on:
List Settings → Versioning Settings → Enable versioning
This ensures SharePoint keeps a full timeline of edits.
🚀 Key Takeaways
- Comments keep conversations organized and visible
- @mentions notify the right people instantly
- Version History protects your data
- You can always roll back mistakes
Together, these features turn SharePoint lists into a true collaboration workspace, not just a spreadsheet replacement 👍
🧩 Working with Columns and Conditional Fields in SharePoint Lists
SharePoint lists become truly powerful when you start customizing columns and adding smart conditional logic. Instead of overwhelming users with unnecessary fields, you can show only what’s relevant—keeping forms clean, accurate, and easy to use 👍.
In this section, we’ll cover:
- ➕ Adding new columns to an existing list
- ✏ Filling values for current items
- 🎯 Showing fields conditionally based on user selection
Let’s build this step by step!
Video Explanation
➕ Adding Additional Columns to a List
As your business grows, your lists often need to capture more information. Adding new columns lets you expand without breaking existing data.
🧪 Example Scenario
You have a Repair Shops list with:
- Shop ID
- Shop Name
- City
Now you want to track:
- Shop Type – Independent or Affiliated
- Affiliation Name – Only for affiliated shops
🧭 Steps to Add New Columns
- Open your SharePoint list
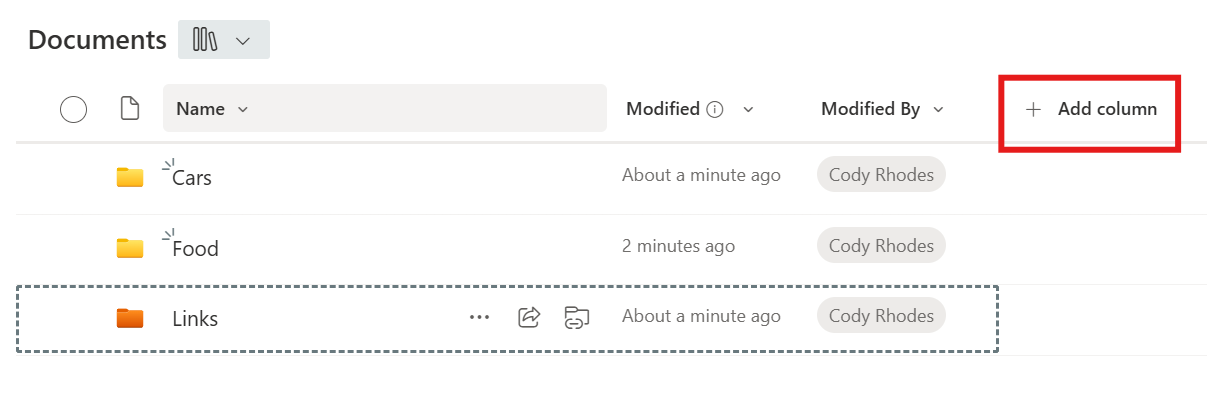
- Click + Add column
- Choose Choice
- Name it Shop Type
- Add choices:
- Independent
- Affiliated
- Enable: Require that this column contains information
- Click Save
Now add the second column:
- Click + Add column
- Select Single line of text
- Name it Affiliation
- Click Save
✅ Your list now includes two new structured fields!
✏ Adding Values to Existing Items
After creating columns, update current rows so they follow the new structure.
🧭 How to Update an Item
- Select a row → Click Edit
- For an independent shop:
- Shop Type → Independent
- Affiliation → NA
- For an affiliated shop:
- Shop Type → Affiliated
- Affiliation → Mega Repairs (or real partner name)
- Click Save
⚠ Problem:
Even when Independent is selected, users can still type an affiliation.
Let’s fix that with conditional logic!
🎯 Applying Conditional Visibility to Columns
We can make the form smarter:
👉 Show Affiliation field ONLY when
Shop Type = Affiliated
🧭 Steps to Add a Condition
- Click Add new item
- In the form, open:
Edit Form → Edit Columns - Find Affiliation column
- Click ⋯ → Edit conditional formula
- Enter a formula like:
=if([$ShopType] == "Affiliated", true, false)
- Save all changes
🧪 Test the Behavior
| Shop Type Selected | Affiliation Field |
|---|---|
| Independent | ❌ Hidden |
| Affiliated | ✅ Visible |
🎉 Now your form stays clean and error-free!
🚀 Why This Matters
- ✔ Users see only relevant fields
- ✔ Data stays consistent
- ✔ Fewer mistakes during entry
- ✔ Professional, guided experience
🧠 Quick Recap
- Add new columns to expand your list
- Update existing rows with structured values
- Use conditional formulas to show/hide fields
- Keep forms simple and intuitive
✅ Ensuring Proper Form Validation in SharePoint Lists
When users enter data into a SharePoint list, there’s always a risk of missing or incorrect information. Without validation, important fields can be skipped—leading to incomplete records and messy data 😬.
Thankfully, SharePoint provides built-in validation tools that let you:
- Enforce rules across multiple fields
- Prevent saving invalid entries
- Show friendly error messages to guide users
Let’s walk through a real-world example:
👉 If a repair shop is marked as “Affiliated,” the Affiliation name must be required.
Video Explanation
⚠ What Happens Without Validation?
Imagine your list has:
- Shop Type → Independent / Affiliated
- Affiliation → Name of parent company
By default, SharePoint allows this:
❌ User selects Affiliated
❌ Leaves Affiliation blank
✔ The form still saves!
This creates confusing, incomplete data—exactly what we want to avoid.
🛠 Adding Row Validation in SharePoint
Row validation lets you define rules that must be satisfied before an item can be saved.
🧭 Steps to Add Validation
- Open your SharePoint list
- Click the ⚙ Settings icon
- Select List settings
- Click Validation settings
You’ll see two fields:
- Formula – where the rule logic goes
- User Message – what users see if validation fails
✏ Example Validation Formula
Rule:
If Shop Type = “Affiliated”, then Affiliation must not be blank
=IF([Shop Type]="Affiliated", NOT(ISBLANK([Affiliation])), TRUE)
💬 User-Friendly Error Message
In the User Message box, add something like:
❗ “Affiliation is required when Shop Type is set to Affiliated.”
This helps users understand exactly what to fix 👍.
🧪 Test the Validation
Try these scenarios:
| Shop Type | Affiliation | Result |
|---|---|---|
| Affiliated | Blank | ❌ Error – cannot save |
| Affiliated | “Mega Repairs” | ✅ Saves |
| Independent | Blank | ✅ Saves |
🎯 Perfect! The rule only applies when needed.
🎯 Key Benefits of Validation
- ✔ Prevents incomplete records
- ✔ Improves data quality
- ✔ Guides users with clear messages
- ✔ Reduces admin cleanup work
🧠 Quick Recap
- Use Validation Settings to enforce rules
- Write formulas that depend on other fields
- Show helpful error messages
- Keep your lists structured and reliable
📅 Calendar View in a SharePoint List
SharePoint lists don’t have to stay as rows and columns! With Calendar View, you can transform date-based data into a visual calendar layout—making it easier to track events, deadlines, and milestones at a glance.
Instead of scrolling through long tables, you’ll see items displayed on days, weeks, or months—just like a real calendar 🗓️.
💡 Important: Calendar View only works if your list has at least one Date-type column. Without a date field, SharePoint won’t know what to plot on the calendar.
Video Explanation
🔑 Why Use Calendar View?
Calendar View is perfect when your list contains time-based information. It helps you:
- 👀 Visualize data instead of reading raw rows
- ⏱ Track deadlines, events, and schedules
- 📈 Spot busy days or trends quickly
- 🧭 Navigate items by month/week/day
Great for scenarios like:
- Customer sign-up dates
- Project deadlines
- Training schedules
- Employee leave tracking
- Event management
🛠 How to Create a Calendar View
Follow these simple steps to turn your list into a calendar:
- Open your SharePoint list
Go to the list that contains a date column (e.g., Sign-up Date, Due Date, Event Date). - Add a New View
At the top right—just above the column headings—click ➕ Add View. - Name the View
In the pop-up window, give it a name like:
👉 Calendar View - Select a Date Column
Choose which date field should drive the calendar.
Examples:- ✔ Sign-up Date
- ✔ Deadline
- ✔ Event Date
- ❌ Date of Birth (not ideal for real tracking)
- Choose a Layout
Set the default display:- Month – best for overall planning
- Week – detailed short-term view
- Day – focused daily schedule
- Click Create
🎉 Your list now appears in a calendar format!
🖼 Practical Example
Imagine you have a Customer Sign-up Date column:
- You can instantly see how many customers joined in a month
- Identify peak sign-up days
- Spot quiet periods for marketing focus
Much more intuitive than reading dates in a table!
🎯 Best Use Cases
| Scenario | Why Calendar View Helps |
|---|---|
| Project deadlines | See upcoming tasks visually |
| Event planning | Avoid date clashes |
| Support tickets | Track SLA dates |
| Employee leave | View overlaps easily |
✅ Key Takeaways
- Calendar View = visual, time-based perspective
- Requires at least one Date column
- Great for planning and trend spotting
- Switch anytime between table and calendar views
🔔 Working with Alerts in Microsoft SharePoint
SharePoint alerts help you stay updated without constantly checking your lists. Once configured, SharePoint automatically notifies you whenever important changes occur—whether to a single item or the entire list. This is perfect for tracking updates like status changes, new entries, or edits made by team members.
Video Explanation
📌 Create an Alert for a Specific List Item
Sometimes you only need to monitor one critical record instead of the whole list. SharePoint lets you set alerts at the item level, so you get notified only when that particular item changes.
How to create an alert:
- Open your SharePoint list and locate the item.
- Click the three dots (…) next to the item.
- Select Alert me from the menu.
You can then configure:
- Alert Title – a meaningful name
- Send Alerts To – one or more email recipients
- Trigger Conditions – e.g., Anything changes or Someone else changes the item
- Notification Timing – immediately, daily summary, or weekly summary
Click OK to activate the alert.
✉ What Happens After an Update
Whenever that item is modified, SharePoint sends an email containing:
- What was changed
- Who made the change
- The date and time of the update
This keeps everyone informed without manual follow-ups.
🧰 Manage or Remove Alerts
As your project grows, you may want to review or clean up alerts.
To manage alerts:
- Open the list
- Click Manage my alerts from the top menu
- From here you can:
- ✏ Edit existing alerts
- 🗑 Delete outdated ones
- ➕ Create alerts for the entire list
💡 Tip: List-level alerts are great when you need to track new items or bulk changes instead of one record.
🎯 Why Use Alerts?
- Saves time by automating notifications
- Reduces missed updates
- Improves collaboration and accountability
- Works for both items and whole lists
✅ Quick Recap
- Alerts notify you automatically via email
- Can be set on individual items or entire lists
- Fully customizable with conditions and schedules
- Easy to edit or delete anytime
📤 Working with SharePoint Lists: Exporting and Deleting Data
Managing SharePoint lists isn’t just about adding data—you’ll often need to export information for reports or clean up outdated records. SharePoint makes both tasks simple with built-in tools, no extra software required.
In this section, we’ll cover:
- Exporting list data to Excel, CSV, or Power BI
- Deleting individual items (with restore options)
- Removing an entire list safely
Video Explanation
📥 Export a SharePoint List
Need to analyze your data in Excel or build dashboards in Power BI? Exporting lets you take your SharePoint list outside the platform in seconds.
🚀 Why Export?
- Create reports and summaries
- Share data with external teams
- Perform advanced analysis in Excel
- Build visual dashboards in Power BI
✅ Export Formats Available
- Excel (.xlsx) – best for analysis and formulas
- CSV – perfect for importing into other systems
- Power BI – ideal for interactive reports
🧭 Steps to Export
- Open your SharePoint list
- Click the Export dropdown at the top
- Choose your preferred format
- The file downloads instantly to your device
💡 Tip: Export to Excel keeps column structure intact, making it easy to continue working with the data offline.
🗑 Delete a SharePoint List Item (With Restore Option)
Cleaning up old or incorrect records keeps your list accurate and relevant. The good news? Deleted items aren’t gone forever—they go to the Recycle Bin first.
🧹 How to Delete an Item
- Select the item from the list
- Click Delete from the top menu
- Confirm the action
The item disappears from the list—but stays recoverable.
♻ How to Restore a Deleted Item
- Open the Recycle Bin (left navigation)
- Find your deleted item
- Click Restore
The item returns exactly to its original location 🎉
🛡 Safety Net: SharePoint’s recycle bin protects you from accidental deletions.
⚠ Delete an Entire SharePoint List
If a list is no longer needed, you can remove it completely.
Steps to Delete a List
- Open the list
- Click the Settings gear icon
- Select List Settings
- Choose Delete this list
- Confirm the action
❗ Important: Deleting a list removes all items inside it—double-check before proceeding.
✅ Quick Summary
| Task | Best For |
|---|---|
| Export to Excel | Reports & calculations |
| Export to CSV | System integrations |
| Export to Power BI | Dashboards |
| Delete Item | Data cleanup |
| Restore Item | Undo mistakes |
| Delete List | Removing unused data |