Table of Contents
- 🎯 What You’ll Learn
- STEP 1 : 🖥️ Creating Two Ubuntu Web Servers
- STEP 2:🚦 Implement URL Routing Using Application Gateway
- 🛡️ Web Application Firewall (WAF)
🎯 What You’ll Learn
In this blog, we dive deeper into Azure Application Gateway and explore how it can be used as a smart and secure entry point for multiple web applications. By the end of this guide, you will understand how to design real-world traffic routing and protect your applications from common web attacks.
Here’s what we will be doing:
- Understand what Azure Application Gateway is and why it works at Layer 7 (Application Layer)
- Deploy two Ubuntu virtual machines running Nginx as independent web servers
- One serving video content
- One serving image content
- Configure Network Security Groups (NSG) to allow:
- SSH access for administration
- HTTP access for users
- Create an Application Gateway as the single public entry point
- Implement URL-based routing so that:
/videos→ goes to the video server/images→ goes to the image server
- Keep backend servers private and protected, exposing only the gateway to the internet
- Enable Web Application Firewall (WAF) to defend against:
- SQL Injection
- Cross-Site Scripting (XSS)
- Protocol violations and other malicious requests
- Learn the difference between:
- Detection mode – monitor attacks
- Prevention mode – actively block threats
By the end of this blog, you will have a clear, hands-on understanding of how Application Gateway can:
✅ Route traffic intelligently
✅ Secure multiple apps with one public IP
✅ Protect web applications using enterprise-grade WAF
Let’s get started 🚀
STEP 1 : 🖥️ Creating Two Ubuntu Web Servers
To demonstrate URL-based routing with Application Gateway, we first need two separate web servers. Each server will handle a different type of content, and later the gateway will decide where to send traffic based on the request URL.
🎯 Goal of This Setup
- Create 2 Ubuntu Virtual Machines in the same subnet
- One VM will serve video pages
- The other VM will serve image pages
- Application Gateway will later route:
/videos→ Video VM/images→ Image VM
💡 We do NOT attach NSG directly to each VM.
Instead, we attach a single NSG to the subnet for centralized control.
🔐 Network & NSG Configuration
While creating the VMs:
- You can assign Public IPs to make SSH access easy for testing
- Skip NSG at VM level (we manage it at subnet level)
Modify NSG Rules
We need two inbound rules:
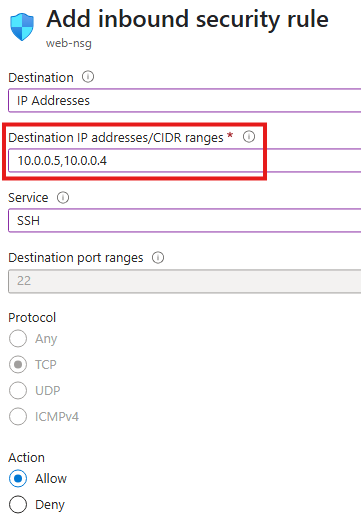
1️⃣ Allow SSH to the VMs
- Destination: Private IPs of the VMs
- Service: SSH (port 22)
- Purpose: Admin access to configure the servers
2️⃣ Allow HTTP Traffic
Since these VMs will act as web servers:
- Source: Internet (Service Tag)
- Destination Port: 80 (HTTP)
- Destination: Private IPs of the VMs
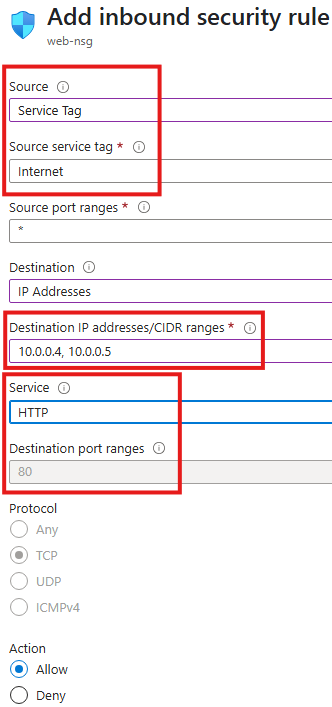
This allows users to browse the pages hosted on the servers.
🧰 Install Nginx on Both VMs
Now we turn both Ubuntu machines into web servers.
SSH into each VM and run:
sudo apt update
sudo apt install nginx
After installation, Nginx starts serving files from:
/var/www/html
🎬 Configure First VM – Video Web Server
On VM 1, we create content for videos:
cd /var/www/html
sudo chmod 777 /var/www/html
mkdir videos
cd videos
echo "Videos for you" > Default.html
Now this server responds to:
👉 http://<VM1-Public-IP>/videos/Default.html
and shows:
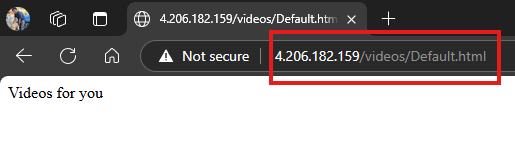
Videos for you
🖼️ Configure Second VM – Image Web Server
On VM 2, repeat the same steps but for images:
cd /var/www/html
sudo chmod 777 /var/www/html
mkdir images
cd images
echo "Images for you" > Default.html
This server is available at:
👉 http://<VM2-Public-IP>/images/Default.html
and displays:
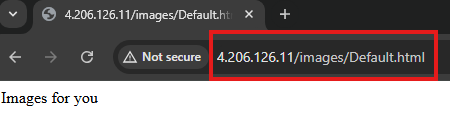
Images for you
✅ What We Have Achieved So Far
At this stage:
✔ Two independent Ubuntu web servers are running
✔ Both are in the same subnet
✔ NSG allows SSH and HTTP access
✔ Each server serves different content
✔ We can browse them directly using their IPs
But users currently need to remember two different IP addresses ❌
In the next step, we will:
Use Application Gateway to provide a single entry point and route traffic automatically based on URL 🚦
STEP 2:🚦 Implement URL Routing Using Application Gateway
Now that we have two web servers ready—one for videos and one for images—it’s time to place Application Gateway in front of them.
The goal is simple:
Users will access a single public IP, and the gateway will decide which VM should handle the request based on the URL.
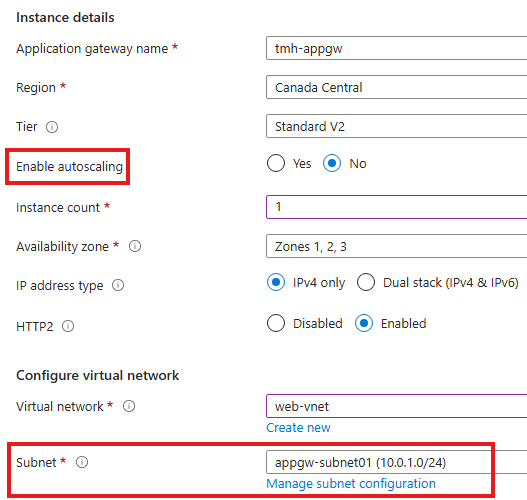
🧱 Prerequisite – Empty Subnet for Application Gateway
Application Gateway must be deployed in its own dedicated subnet.
It cannot share a subnet with VMs or other resources.
So first ensure:
✔ A separate subnet exists (e.g., appgw-subnet01)
✔ No VMs or other services are inside this subnet
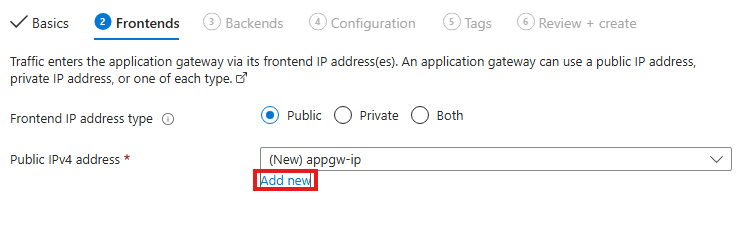
🌐 Create Frontend IP
While creating the Application Gateway:
- Add a new Public IP address
- This IP becomes the single entry point for all users
💡 After this setup, users will no longer connect directly to the web servers—only to this frontend IP.
🧩 Create Backend Pools
We need two backend pools, one for each server:
- 🎬 videoserver → points to Video VM
- 🖼️ imageserver → points to Image VM
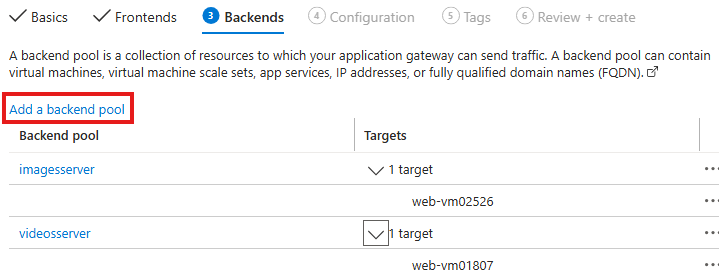
Each pool contains the private IP of the corresponding Ubuntu VM.
🎧 Configure Listener
The Listener decides when routing rules should be applied.
We create a listener with:
- Protocol: HTTP
- Port: 80
- Frontend IP: Application Gateway public IP

📌 Listener = “Wait for requests on this IP and port before applying any routing logic.”
🎯 Configure Backend Targets
Next we connect the listener to a backend pool:
- Select a backend pool (e.g., videoserver)
- Create Backend Settings
- Just provide a name like
settings01
- Just provide a name like
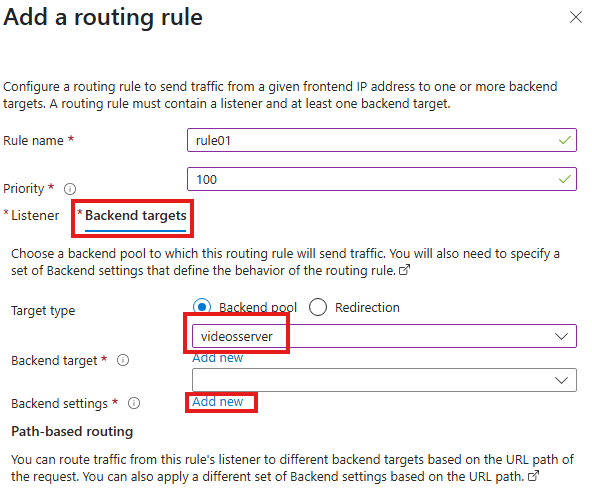
Backend settings define how the gateway communicates with the servers.
🔀 Add Path-Based Routing Rules
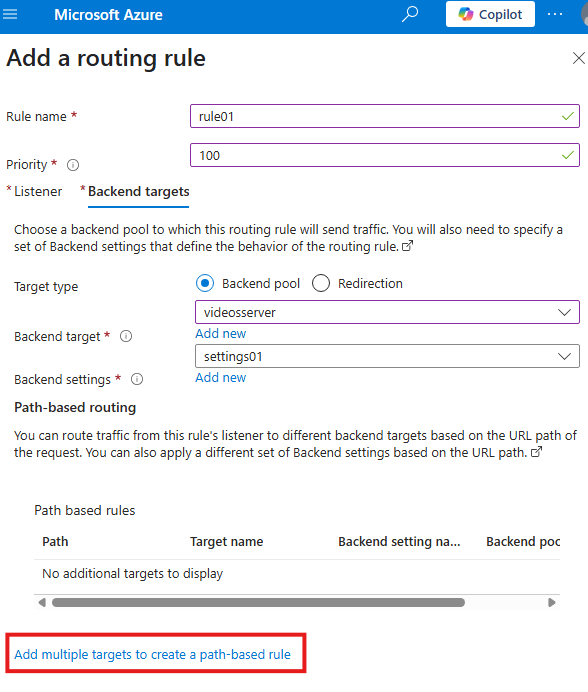
This is the heart of the demo 🔥.
We click:
👉 Add multiple targets to create a path-based rule
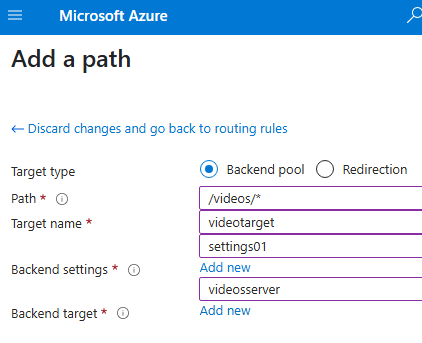
Then create two paths:
Rule 1 – Videos
- Path:
/videos/* - Target: videoserver
- Backend settings: settings01
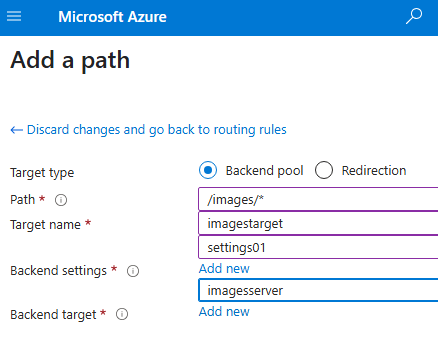
Rule 2 – Images
- Path:
/images/* - Target: imageserver
- Backend settings: settings01
🧠 Now the gateway can read the URL and decide where to send the request.
🧪 Test the Setup
Access the Application Gateway public IP:
👉 http://<appgw-ip>/videos/Default.html
➡ Shows “Videos for you”
👉 http://<appgw-ip>/images/Default.html
➡ Shows “Images for you”

🎉 URL-based routing is working!
🔐 Final Architecture Result
✔ Only Application Gateway needs a public IP
✔ Web servers can stay private
✔ Users access one endpoint
✔ Traffic is routed intelligently by URL
| URL | Destination |
|---|---|
| /videos | Video VM |
| /images | Image VM |
💡 What We Achieved
- Implemented Layer 7 routing
- Reduced public exposure
- Centralized traffic control
- Prepared foundation for WAF security
In the next section, we will:
Enable Web Application Firewall (WAF) to protect these applications from real attacks 🛡️.
🛡️ Web Application Firewall (WAF)
So far, we have used Application Gateway for routing traffic intelligently.
Now we add the most important layer — Web Application Firewall (WAF).
💡 WAF is enabled and managed directly from the Application Gateway resource, not from the backend VMs or App Service.
WAF protects web applications from common and dangerous attacks such as:
- 💉 SQL Injection
- 🧨 Cross-Site Scripting (XSS)
- 🚫 Protocol violations
- 🤖 Malicious bots and scanners
Instead of exposing our web servers directly to the internet, WAF acts like a smart shield in front of them.
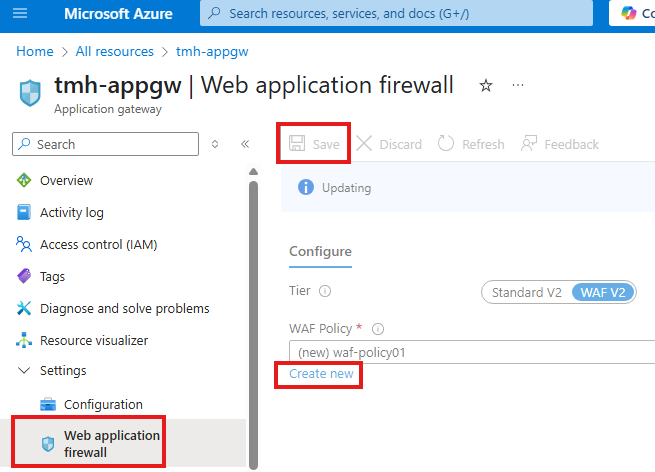
🆕 Creating a WAF Policy
To enable WAF on the Application Gateway:
- Open the Application Gateway resource
- Go to the Web Application Firewall blade
- Click Create new to create a WAF policy
This policy will be attached to the gateway and will inspect all incoming requests.
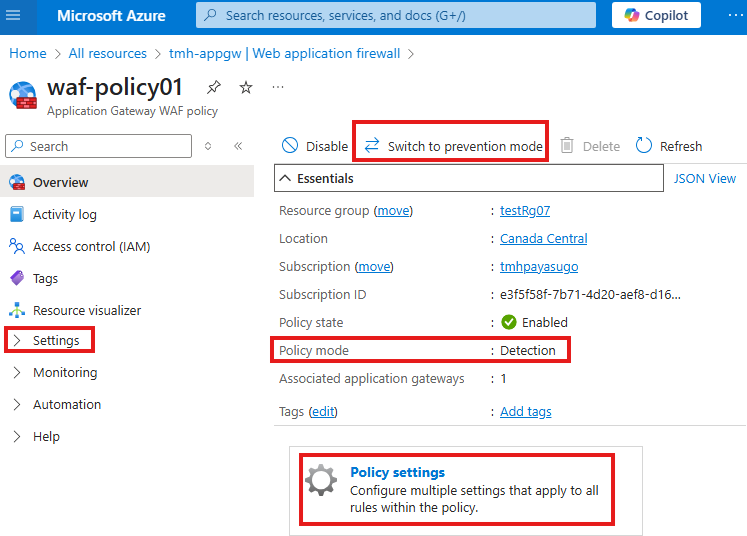
🔍 Detection Mode vs Prevention Mode
After the policy is created, its default mode is:
👉 Detection Mode
- WAF only logs suspicious requests
- Traffic is still allowed to reach the application
- Useful for testing without blocking real users
You can switch to:
👉 Prevention Mode
- Malicious requests are actively blocked
- Real protection for production environments
💡 Best Practice
Start with Detection, monitor logs, then move to Prevention.
📦 Managed Rules
Inside the WAF policy:
- Go to Policy settings → Managed rules
Here you will see a large set of built-in rules provided by Microsoft (based on OWASP standards).
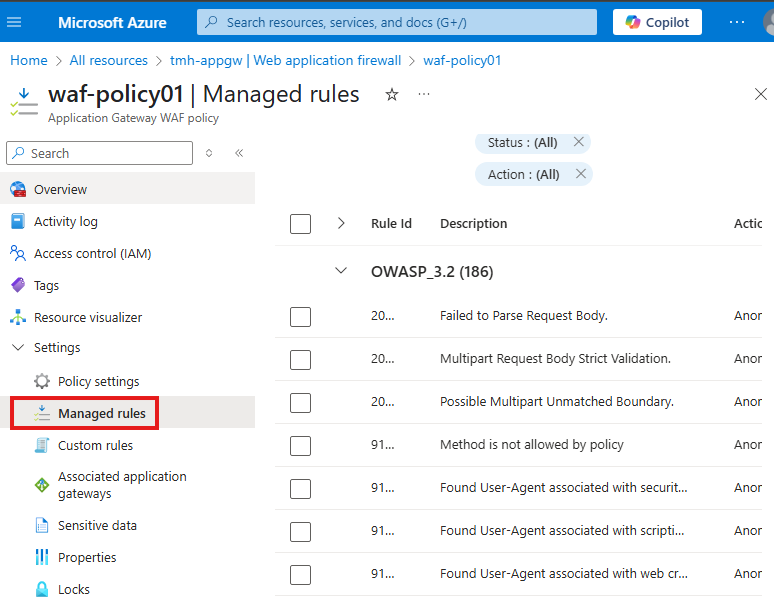
These rules automatically detect:
- SQL injection patterns
- XSS payloads
- Illegal HTTP methods
- Malformed requests
✅ No need to write complex security logic — WAF handles it for you.
✍ Adding Custom Rules
Apart from managed rules, we can create our own logic.
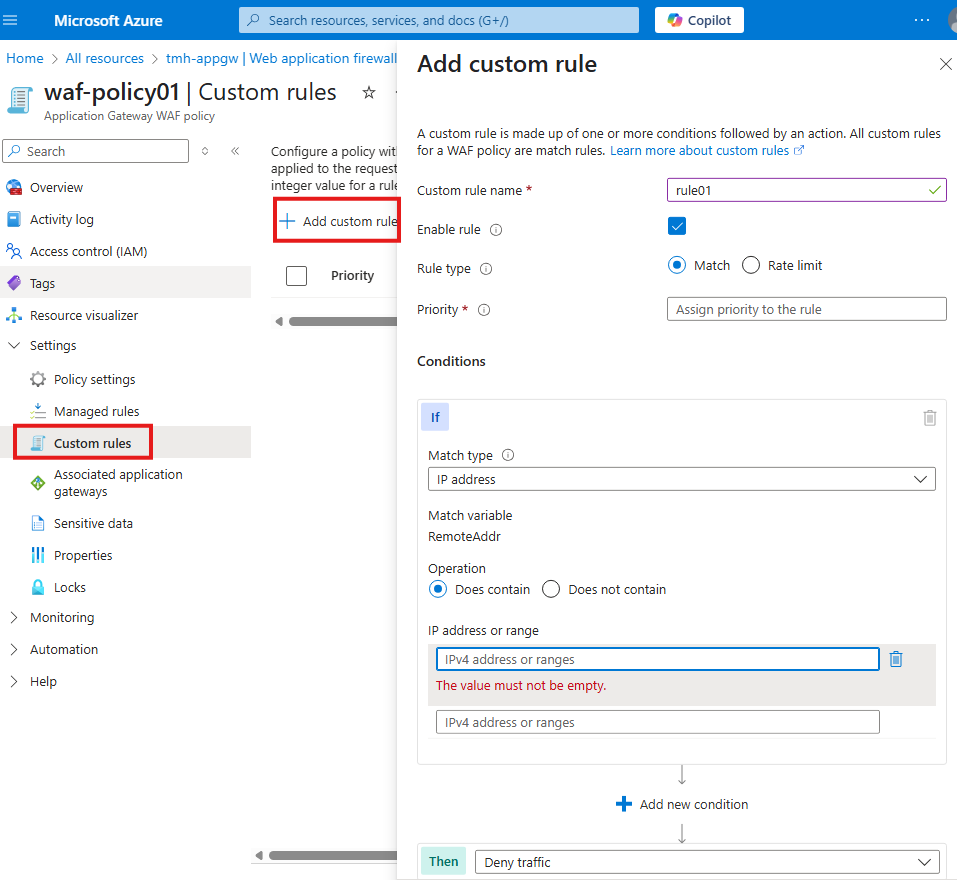
From the Custom rules blade:
- Click + Add custom rule
- Define conditions such as:
- Block specific IP addresses
- Allow only certain countries
- Rate-limit requests
- Deny traffic matching patterns
Example:
Block traffic if request comes from a specific IP range → Deny traffic
This gives full control over application security.
🧠 What We Achieved
By enabling WAF:
✔ Application Gateway inspects every request
✔ Common attacks are detected and blocked
✔ Security is centralized
✔ Backend VMs stay protected
🏁 Final Architecture
User → Internet
➡ Application Gateway + WAF
➡ URL Routing
➡ Video / Image Web Servers
Our web apps are now not just reachable — they are secure and enterprise-ready 🔐.
Leave a Reply